547_Sharpening_Station_Upgrade.mp3

Matt's Basement Workshop Podcast
enJune 05, 2015
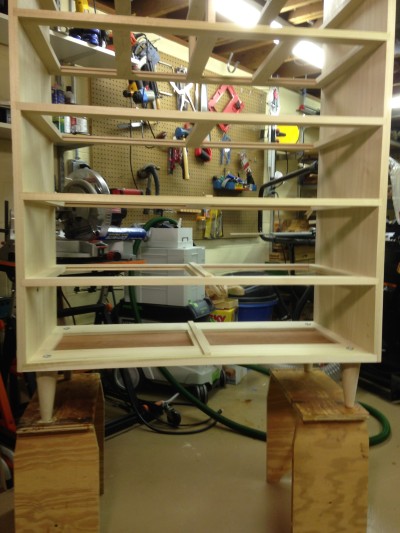
When I first came up with the basic design for Madison's dresser I knew I wanted to incorporate turned feet into it.
I'm still as novice a woodturner as anyone can be, but as I've learned over the years the quickest way to becoming better is to be at the tool rest as frequent as possible.
So for today's episode it's all about my time in front of the lathe turning and shaping the four tapered feet that support the entirety of the dresser.
Originally I tried to convince myself that a much simpler form would suffice, but once we had the plans together there was no doubt in my mind a tapered turned foot was a must.
I'm sure this style of design has a given name (they all do,) but whatever it is, it just appealed to me as I thought about what my daughter would like for her own piece of furniture.
The turning and tapering process is really simple, as you'll see when you watch, but it wasn't until I started the fourth foot that I finally found I had been way overcomplicating the process.
I obviously spent way to much time overthinking, and being overcautious (don't confuse this with being flippant and cavalier about my safety) in how I was approaching it.
The difference in time to accomplish the same task from the very first foot to that last one dropped dramatically.Too bad I didn't film that last one though.
Still, the technique I demonstrate achieved the same result and was only about 1-2 minutes longer in overall time.
My take away lesson in all of this? "Don't be shy with hogging away the material." Get right in there and get to work removing the waste quickly (and safely) so you can start finessing the final shape quicker.
A full set of detailed plans are available for sale on my website, thanks to Brian Benham of Benham Design Concepts.
You can find them by visiting our new "Digital Downloads Store" by clicking here.


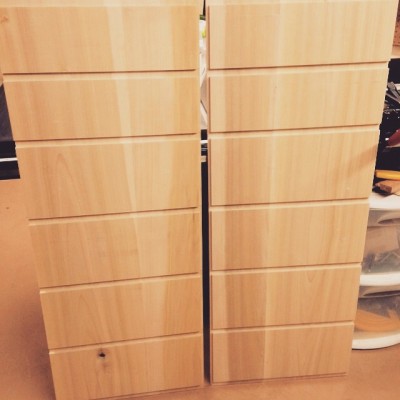
We’re making progress with the 8 drawer tall dresser I’m building for my daughter Madison.
In today’s episode we’re moving on to building the drawer frames for the dresser. Drawer frames are a crucial component in the overall body of the dresser, and while most probably won’t notice them in their entirety (other than the edge of the front facing rail) it’s still important to make sure they’re well constructed.
There are a number of joinery options to choose from, including non-traditional joinery such as pocket-holes (which is actually what I was originally planning to use.) But the joinery I decided to use in this build was a traditional tongue and groove joint.
To insure the mating pieces match up as perfect as possible, I opted to use a tongue and groove router bit set I featured several years ago in an episode of “Router Bit of the Month.”
Also featured in this episode is the glue-up process for assembling the drawer frames and a quick discussion of cleaning up the dados from the last episode (something I didn’t plan to do, but it turns out they needed a little assistance.)
A full set of detailed plans are available for sale on my website, thanks to Brian Benham of Benham Design Concepts.
You can find them by visiting our new "Digital Downloads Store" by clicking here.
It’s time to get started with the actual building of Madison’s tall dresser, and the first steps in the process is making the sides for the body.
These consist of two wide, solid-wood panels just over 49 inches in length and 19 inches in width. In order for us to attach the drawer frames (which not only support the drawers but are an important part of the overall structural framework of the dresser,) we need to plow out a few dados across the width of the sides and cut rabbets at the top/bottom and also on the back edge to eventually receive the back panel.
For the side panels I got really lucky and chose two extra-wide boards (approximately 12+ inches in width each) to make up the majority of the width, and then eventually glued them together with some not so extra-wide 8 inch boards to give me a rough dimension I could start working with.
To mill the extra-wide boards I decided against ripping them to widths that would fit on my 8 inch jointer, and instead built a very simple thickness planer sled that would allow me to flatten one face as if I had ran it over the cutter head of a monster-sized jointer. Then after the glue-up was completed it was over to the table saw to crosscut and rip the panels to size, followed by installing my dado blade and getting to work on those dados and rabbets.
I’d love to tell you there weren’t any complications along the way…but that would be a lie! So we’ll discuss what happened and how I fixed those mistakes in today’s episode. A full set of detailed plans are available for sale on my website, thanks to Brian Benham of Benham Design Concepts.
You can find them by visiting our new "Digital Downloads Store" by clicking here.
Once the design and the dimensions have all been worked out in the planning process it’s time to order the lumber and then start sorting through the stacks looking for just the pieces for each component.
Since this project is being painted I’m not worried about matching colors or grain patterns, but I’d still like to find stock that can easily accommodate specific sizes and to also select flawed pieces that might be more suitable for interior components.
This task is a great opportunity to familiarize yourself with the stack and also helps to pass the time while waiting for the lumber to acclimate to your shop, if it’s necessary like it is for this project in the middle of winter.
In this episode we talk about my own design process, starting from the rough idea on to the finished plans and drawings.
For many the process comes from a variety of places for inspiration, but for myself it most is a result of the family identifying a need and letting me know we need to fill it. While it’s a long road from being inspired by a muse of mythological origins, it’s still very effective and has resulted in some great projects that fill our house.
Stay up to date
For any inquiries, please email us at hello@podcastworld.io